2019-07-19
This article is based on historical research and on simply reading the Vim user manual cover to cover. Hopefully these notes will help you (re?)discover core functionality of the editor, so you can abandon pre-packaged vimrc files and use plugins more thoughtfully.
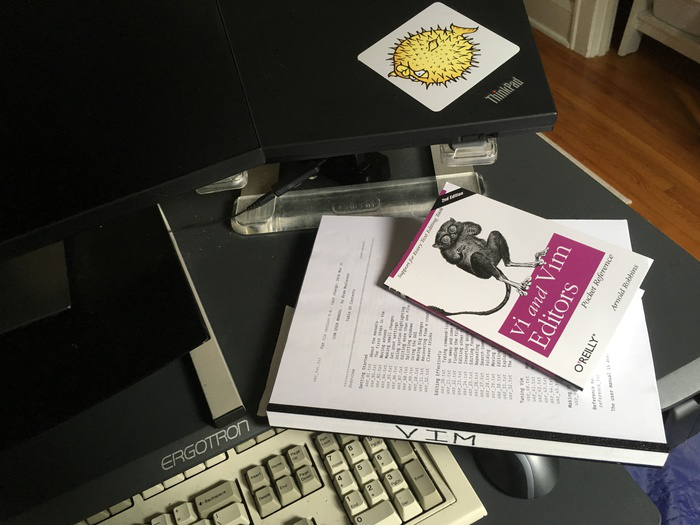
To go beyond the topics in this blog post, I’d recommend getting a
paper copy of the manual and a good pocket reference. I couldn’t find
any hard copy of the official Vim manual, and ended up printing this PDF using printme1.com. The PDF is a
printer-friendly version of the files
$VIMRUNTIME/doc/usr_??.txt distributed with the editor. For
a convenient list of commands, I’d recommend the vi
and Vim Editors Pocket Reference.
Vi commands and features go back more than fifty years, starting with the QED editor. Here is the lineage:
You can discover the similarities all the way between QED and ex by reading the QED manual and ex manual. Both editors use a similar grammar to specify and operate on line ranges.
Editors like QED, ed, and em were designed for hard-copy terminals, which are basically electric typewriters with a modem attached. Hard-copy terminals print system output on paper. Output could not be changed once printed, obviously, so the editing process consisted of user commands to update and manually print ranges of text.
By 1976 video terminals such as the ADM-3A started to be available. The Ex editor added an “open mode” which allowed intraline editing on video terminals, and a visual mode for screen oriented editing on cursor-addressible terminals. The visual mode (activated with the command “vi”) kept an up-to-date view of part of the file on screen, while preserving an ex command line at the bottom of the screen. (Fun fact: the h,j,k,l keys on the ADM-3A had arrows drawn on them, so that choice of motion keys in vi was simply to match the keyboard.)
Learn more about the journey from ed to ex/vi in this interview with Bill Joy. He talks about how he made ex/vi, and some things that disappointed him about it.
Classic vi is truly just an alter-ego of ex – they are the same binary, which decides to start in ex mode or vi mode based on the name of the executable invoked. The legacy of all this history is that ex/vi is refined by use, requires scant system resources, and can operate under limited bandwidth communication. It is also available on most systems and fully specified in POSIX.
Being a derivative of ed, the ex/vi editor was intellectual property of AT&T. To use vi on platforms other than Unix, people had to write clones that did not share in the original codebase.
Some of the clones:
We’ll be focusing on that little one in the middle: vim. Bram Moolenaar wanted to use vi on the Amiga. He began porting Stevie from the Atari and evolving it. He called his port “Vi IMitation.” For a full first-hand account, see Bram’s interview with Free Software Magazine.
By version 1.22 Vim was rechristened “Vi IMproved,” matching and surpassing features of the original. Here is the timeline of the next major versions, with some of their big features:
| 1991 Nov 2 | Vim 1.14: First release (on Fred Fish disk #591). |
| 1992 | Vim 1.22: Port to Unix. Vim now competes with Vi. |
| 1994 Aug 12 | Vim 3.0: Support for multiple buffers and windows. |
| 1996 May 29 | Vim 4.0: Graphical User Interface (largely by Robert Webb). |
| 1998 Feb 19 | Vim 5.0: Syntax coloring/highlighting. |
| 2001 Sep 26 | Vim 6.0: Folding, plugins, vertical split. |
| 2006 May 8 | Vim 7.0: Spell check, omni completion, undo branches, tabs. |
| 2016 Sep 12 | Vim 8.0: Jobs, async I/O, native packages. |
For more info about each version, see e.g. :help vim8.
To see plans for the future, including known bugs, see
:help todo.txt.
Version 8 included some async job support due to peer pressure from NeoVim, whose developers wanted to run debuggers and REPLs for their web scripting languages inside the editor.
Vim is super portable. By adapting over time to work on a wide variety of platforms, the editor was forced to keep portable coding habits. It runs on OS/390, Amiga, BeOS and BeBox, Macintosh classic, Atari MiNT, MS-DOS, OS/2, QNX, RISC-OS, BSD, Linux, OS X, VMS, and MS-Windows. You can rely on Vim being there no matter what computer you’re using.
In a final twist in the vi saga, the original ex/vi source code was finally released in 2002 under a BSD free software license. It is available at ex-vi.sourceforge.net.
Let’s get down to business. Before getting to odds, ends, and intermediate tricks, it helps to understand how Vim organizes and reads its configuration files.
I used to think, incorrectly, that Vim reads all its settings and scripts from the ~/.vimrc file alone. Browsing random “dotfiles” repositories can reinforce this notion. Quite often people publish monstrous single .vimrc files that try to control every aspect of the editor. These big configs are sometimes called “vim distros.”
In reality Vim has a tidy structure, where .vimrc is just one of several inputs. In fact you can ask Vim exactly which scripts it has loaded. Try this: edit a source file from a random programming project on your computer. Once loaded, run
:scriptnamesTake time to read the list. Try to guess what the scripts might do, and note the directories where they live.
Was the list longer than you expected? If you have installed loads of
plugins the editor has a lot to do. Check what slows down the editor
most at startup by running the following and look at the
start.log it creates:
vim --startuptime start.log name-of-your-fileJust for comparison, see how quickly Vim starts without your existing configuration:
vim --clean --startuptime clean.log name-of-your-fileTo determine which scripts to run at startup or buffer load time, Vim traverses a “runtime path.” The path is a comma-separated list of directories that each contain a common structure. Vim inspects the structure of each directory to find scripts to run. Directories are processed in the order they appear in the list.
Check the runtimepath on your system by running:
:set runtimepathMy system contains the following directories in the default value for
runtimepath. Not all of them even exist in the filesystem,
but they would be consulted if they did.
Because directories are processed by their order in line, the only thing that is special about the “after” directories is that they are at the end of the list. There is nothing magical about the word “after.”
When processing each directory, Vim looks for subfolders with
specific names. To learn more about them, see
:help runtimepath. Here is a selection of those we will be
covering, with brief descriptions.
:compiler
Finally, ~/.vimrc is the catchall for general editor
settings. Use it for setting defaults that can be overridden for
particular file types. For a comprehensive overview of settings you can
choose in .vimrc, run :options.
Plugins are simply Vim scripts that must be put into the correct places in the runtimepath in order to execute. Installing them is conceptually easy: download the file(s) into place. The challenge is that it’s hard to remove or update some plugins because they litter subdirectories in the runtimepath with their scripts, and it can be hard to tell which plugin is responsible for which files.
“Plugin managers” evolved to address this need. Vim.org has had a plugin registry going back at least as far as 2003 (as identified by the Internet Archive). However it wasn’t until about 2008 that the notion of a plugin manager really came into vogue.
These tools add plugins’ separate directories to Vim’s runtimepath, and compile help tags for plugin documentation. Most plugin managers also install and update plugin code from the internet, sometimes in parallel or with colorful progress bars.
In chronological order, here is the parade of plugin managers. I based the date ranges on earliest and latest releases of each, or when no official releases are identified, on the earliest and latest commit dates.
The first thing to note is the overwhelming variety of these tools, and the second is that each is typically active for about four years before presumably going out of fashion.
The most stable way to manage plugins is to simply use Vim 8’s built-in functionality, which requires no third-party code. Let’s walk through how to do it.
First create two directories, opt and start, within a pack directory in your runtimepath.
mkdir -p ~/.vim/pack/foobar/{opt,start}Note the placeholder “foobar.” This name is entirely up to you. It classifies the packages that will go inside. Most people throw all their plugins into a single nondescript category, which is fine. Pick whatever name you like; I’ll continue to use foobar here. You could theoretically create multiple categories too, like ~/.vim/pack/navigation and ~/.vim/pack/linting. Note that Vim does not detect duplication between categories and will double-load duplicates if they exist.
Packages in “start” get loaded automatically, whereas those in “opt”
won’t load until specifically requested in Vim with the
:packadd command. Opt is good for lesser-used packages, and
keeps Vim fast by not running scripts unnecessarily. Note that there
isn’t a counterpart to :packadd to unload a package.
For this example we’ll add the “ctrlp” fuzzy find plugin to opt. Download and extract the latest release into place:
curl -L https://github.com/kien/ctrlp.vim/archive/1.79.tar.gz \
    | tar zx -C ~/.vim/pack/foobar/opt
That command creates a ~/.vim/pack/foobar/opt/ctrlp.vim-1.79 folder, and the package is ready to use. Back in vim, create a helptags index for the new package:
:helptags ~/.vim/pack/foobar/opt/ctrlp.vim-1.79/docThat creates a file called “tags” in the package’s doc folder, which
makes the topics available for browsing in Vim’s internal help system.
(Alternately you can run :helptags ALL once the package has
been loaded, which takes care of all docs in the runtimepath.)
When you want to use the package, load it (and know that tab completion works for plugin names, so you don’t have to type the whole name):
:packadd ctrlp.vim-1.79Packadd includes the package’s base directory in the runtimepath, and sources its plugin and ftdetect scripts. After loading ctrlp, you can press CTRL-P to pop up a fuzzy find file matcher.
Some people keep their ~/.vim directory under version control and use git submodules for each package. For my part, I simply extract packages from tarballs and track them in my own repository. If you use mature packages you don’t need to upgrade them often, plus the scripts are generally small and don’t clutter git history much.
Depending on user settings, Vim can protect against four types of loss:
Before examining sensible settings, how about some comic relief? Here are just a sampling of comments from vimrc files on GitHub:
The comments reflect awareness of only the fourth case above (and the third by accident), whereas the authors generally go on to disable the swap file too, leaving one and two unprotected.
Here is the configuration I recommend to keep your edits safe:
" Protect changes between writes. Default values of
" updatecount (200 keystrokes) and updatetime
" (4 seconds) are fine
set swapfile
set directory^=~/.vim/swap//

" protect against crash-during-write
set writebackup
" but do not persist backup after successful write
set nobackup
" use rename-and-write-new method whenever safe
set backupcopy=auto
" patch required to honor double slash at end
if has("patch-8.1.0251")
    " consolidate the writebackups -- not a big
    " deal either way, since they usually get deleted
    set backupdir^=~/.vim/backup//
end

" persist the undo tree for each file
set undofile
set undodir^=~/.vim/undo//
These settings enable backups for writes-in-progress, but do not
persist them after successful write because version control etc etc.
Note that you’ll need to mkdir ~/.vim/{swap,undodir,backup}
or else Vim will fall back to the next available folder in the
preference list. You should also probably chmod the folders to keep the
contents private, because the swap files and undo history might contain
sensitive information.
One thing to note about the paths in our config is that they end in a
double slash. That ending enables a feature to disambiguate swaps and
backups for files with the same name that live in different directories.
For instance the swap file for /foo/bar will be saved in
~/.vim/swap/%foo%bar.swp (slashes escaped as percent
signs). Vim had a bug until a fairly recent patch where the double slash
was not honored for backupdir, and we guard against that above.
We also have Vim persist the history of undos for each file, so that you can apply them even after quitting and editing the file again. While it may sound redundant with the swap file, the undo history is complementary because it is written only when the file is written. (If it were written more frequently it might not match the state of the file on disk after a crash, so Vim doesn’t do that.)
Speaking of undo, Vim maintains a full tree of edit history. This
means you can make a change, undo it, then redo it differently and all
three states are recoverable. You can see the times and magnitude of
changes with the :undolist command, but it’s hard to
visualize the tree structure from it. You can navigate to specific
changes in that list, or move in time with :earlier and
:later which take a time argument like 5m, or the count of
file saves, like 3f. However navigating the undo tree is an instance
when I think a plugin – like undotree – is
warranted.
Enabling these disaster recovery settings can bring you peace of mind. I used to save compulsively after most edits or when stepping away from the computer, but now I’ve made an effort to leave documents unsaved for hours at a time. I know how the swap file works now.
Some final notes: keep an eye on all these disaster recovery files, they can pile up in your .vim folder and use space over time. Also setting nowritebackup might be necessary when saving a huge file with low disk space, because Vim must otherwise make an entire copy of the file temporarily. By default the “backupskip” setting disables backups for anything in the system temp directory.
Vim’s “patchmode” is related to backups. You can use it in
directories that aren’t under version control. For instance if you want
to download a source tarball, make an edit and send a patch over a
mailing list without bringing git into the picture. Run
:set patchmod=.orig and any file ‘foo’ Vim is about to
write will be backed up to ‘foo.orig’. You can then create a patch on
the command line between the .orig files and the new ones.
Most programming languages allow you to include one module or file
from another. Vim knows how to track program identifiers in included
files using the configuration settings path,
include, suffixesadd, and
includeexpr. The identifier search (see
:help include-search) is an alternative to maintaining a
tags file with ctags for system headers.
The settings for C programs work out of the box. Other languages are
supported too, but require tweaking. That’s outside the scope of this
article, see :help include.
If everything is configured right, you can press [i on
an identifier to display its definition, or [d for a macro
constant. Also when you press gf with the cursor on a
filename, Vim searches the path to find it and jump there. Because the
path also affects the :find command, some people have the
tendency to add ‘**/*’ or commonly accessed directories to the path in
order to use :find like a poor man’s fuzzy finder. Doing
this slows down the identifier search with directories which aren’t
relevant to that task.
A way to get the same level of crappy find capability, without polluting the path, is to just make another mapping. You can then press <Leader><space> (which is typically backslash space) then start typing a filename and use tab or CTRL-D completion to find the file.
" fuzzy-find lite
nmap <Leader><space> :e ./**/
Just to reiterate: the path parameter was designed for header files.
If you want more proof, there is even a :checkpath command
to see whether the path is functioning. Load a C file and run
:checkpath. It will display filenames it was unable to find
that are included transitively by the current file. Also
:checkpath! with a bang dumps the whole hierarchy of files
included from the current file.
By default path has the value “.,/usr/include,,” meaning the working
directory, /usr/include, and files that are siblings of the active
buffer. The directory specifiers and globs are pretty powerful, see
:help file-searching for the details.
In my C ftplugin (more on that later), I also have the path search for include files within the current project, like ./src/include or ./include .
setlocal path=.,,*/include/**3,./*/include/**3
setlocal path+=/usr/include
The ** with a number like **3 bounds the depth of the search in subdirectories. It’s wise to add depth bounds where you can to avoid identifier searches that lock up.
Here are other patterns you might consider adding to your path if
:checkpath identifies that files can’t be found in your
project. It depends on your system of course.
/usr/include/**4,/usr/local/include/**3/usr/local/Cellar/**2/include/**2/opt/local/include/**/usr/local/lib/\*/include,/usr/X11R6/include/\*\*3See also: :he [, :he gf,
:he :find.
The :make command runs a program of the user’s choice to
build a project, and collects the output in the quickfix buffer. Each
item in the quickfix records the filename, line, column, type
(warning/error) and message of each output item. A fairly idomatic
mapping uses bracket commands to move through quickfix items:
" quickfix shortcuts
nmap ]q :cnext<cr>
nmap ]Q :clast<cr>
nmap [q :cprev<cr>
nmap [Q :cfirst<cr>
If, after updating the program and rebuilding, you are curious what
the error messages said last time, use :colder (and
:cnewer to return). To see more information about the
currently selected error use :cc, and use
:copen to see the full quickfix buffer. You can populate
the quickfix yourself without running :make with
:cfile, :caddfile, or :cexpr.
Vim parses output from the build process according to the errorformat string, which contains scanf-like escape sequences. It’s typical to set this in a “compiler file.” For instance, Vim ships with one for gcc in $VIMRUNTIME/compiler/gcc.vim, but has no compiler file for clang. I created the following definition for ~/.vim/compiler/clang.vim:
" formatting variations documented at
" https://clang.llvm.org/docs/UsersManual.html#formatting-of-diagnostics
"
" It should be possible to make this work for the combination of
" -fno-show-column and -fcaret-diagnostics as well with multiline
" and %p, but I was too lazy to figure it out.
"
" The %D and %X patterns are not clang per se. They capture the
" directory change messages from (GNU) 'make -w'. I needed this
" for building a project which used recursive Makefiles.

CompilerSet errorformat=
    \%f:%l%c:{%*[^}]}{%*[^}]}:\ %trror:\ %m,
    \%f:%l%c:{%*[^}]}{%*[^}]}:\ %tarning:\ %m,
    \%f:%l:%c:\ %trror:\ %m,
    \%f:%l:%c:\ %tarning:\ %m,
    \%f(%l,%c)\ :\ %trror:\ %m,
    \%f(%l,%c)\ :\ %tarning:\ %m,
    \%f\ +%l%c:\ %trror:\ %m,
    \%f\ +%l%c:\ %tarning:\ %m,
    \%f:%l:\ %trror:\ %m,
    \%f:%l:\ %tarning:\ %m,
    \%D%*\\a[%*\\d]:\ Entering\ directory\ %*[`']%f',
    \%D%*\\a:\ Entering\ directory\ %*[`']%f',
    \%X%*\\a[%*\\d]:\ Leaving\ directory\ %*[`']%f',
    \%X%*\\a:\ Leaving\ directory\ %*[`']%f',
    \%DMaking\ %*\\a\ in\ %f

CompilerSet makeprg=make
To activate this compiler profile, run :compiler clang.
This is typically done in an ftplugin file.
Another example is running GNU Diction on a text document to identify wordy and commonly misused phrases in sentences. Create a “compiler” called diction.vim:
CompilerSet errorformat=%f:%l:\ %m
CompilerSet makeprg=diction\ -s\ %
After you run :compiler diction you can use the normal
:make command to run it and populate the quickfix. The
final mild convenience in my .vimrc is a mapping to run make:
" real make
map <silent> <F5> :make<cr><cr><cr>
" GNUism, for building recursively
map <silent> <s-F5> :make -w<cr><cr><cr>Vim’s internal diffing is powerful, but it can be daunting,
especially the three-way merge view. In reality it’s not so bad once you
take time to study it. The main idea is that every window is either in
or out of “diff mode.” All windows put in diffmode (with
:difft[his]) get compared with all other windows already in
diff mode.
For example, let’s start simple. Create two files:
echo "hello, world" > h1
echo "goodbye, world" > h2

vim h1 h2
In vim, split the arguments into their own windows with
:all. In the top window, for h1, run :difft.
You’ll see a gutter appear, but no difference detected. Move to the
other window with CTWL-W CTRL-W and run :difft again. Now
hello and goobye are identified as different in the current chunk.
Continuing in the bottom window, you can run :diffg[et] to
get “hello” from the top window, or :diffp[ut] to send
“goodbye” into the top window. Pressing ]c or
[c would move between chunks if there were more than
one.
A shortcut would be running vim -d h1 h2 instead (or its
alias, vimdiff h1 h2) which applies :difft to
all windows. Alternatively, load just h1 with vim h1 and
then :diffsplit h2. Remember that fundamentally these
commands just load files into windows and set the diff mode.
With these basics in mind, let’s learn to use Vim as a three-way mergetool for git. First configure git:
git config merge.tool vimdiff
git config merge.conflictstyle diff3
git config mergetool.prompt false
Now, when you hit a merge conflict, run git mergetool.
It will bring Vim up with four windows. This part looks scary, and is
where I used to flail around and often quit in frustration.
+-----------+------------+------------+
|           |            |            |
|           |            |            |
|   LOCAL   |    BASE    |   REMOTE   |
+-----------+------------+------------+
|                                     |
|                                     |
|             (edit me)               |
+-------------------------------------+
Here’s the trick: do all the editing in the bottom window. The top three windows simply provide context about how the file differs on either side of the merge (local / remote), and how it looked prior to either side doing any work (base).
Move within the bottom window with ]c, and for each
chunk choose whether to replace it with text from local, base, or remote
– or whether to write in your own change which might combine parts from
several.
To make it easier to pull changes from the top windows, I set some mappings in my vimrc:
" shortcuts for 3-way merge
map <Leader>1 :diffget LOCAL<CR>
map <Leader>2 :diffget BASE<CR>
map <Leader>3 :diffget REMOTE<CR>
We’ve already seen :diffget, and here our bindings pass
an argument of the buffer name that identifies which window to pull
from.
Once done with the merge, run :wqa to save all the
windows and quit. If you want to abandon the merge instead, run
:cq to abort all changes and return an error code to the
shell. This will signal to git that it should ignore your changes.
Diffget can also accept a range. If you want to pull in all
changes from one of the top windows rather than working chunk by chunk,
just run :1,$+1diffget {LOCAL,BASE,REMOTE}. The “+1” is
required because there can be deleted lines “below” the last line of a
buffer.
The three-way marge is fairly easy after all. There’s no need for plugins like Fugitive, at least for presenting a simplified view for resolving merge conflicts.
Finally, as of patch 8.1.0360, Vim is bundled with the xdiff library and can create diffs internally. This can be more efficient than shelling out to an external program, and allows for a choice of diff algorithms. The “patience” algorithm often produces more human-readable output than the default, “myers.” Set it in your .vimrc like so:
if has("patch-8.1.0360")
    set diffopt+=internal,algorithm:patience
endifSee if this sounds familiar: you’re editing a buffer and want to save
it as a new file, so you :w newname. After editing some
more, you :w, but it writes over the original file. What
you want for this scenario is :saveas newname, which does
the write but also changes the filename of the buffer for future writes.
Alternately, the :file newname command will change the
filename without doing a write.
It also pays off to learn more about the read and write commands. Becuase r and w are Ex commands, they work with ranges. Here are some variations you might not know about:
| :w >>foo | append the whole buffer to a file |
| :.w >>foo | append current line to a file |
| :$r foo | read foo into the end of the buffer |
| :0r foo | read foo into the start, moving existing lines down |
| :.,$w foo | write current line and below to a file |
| :r !ls | read ls output into cursor position |
| :w !wc | send buffer to wc and display output |
| :.!tr ‘A-Za-z’ ‘N-ZA-Mn-za-m’ | apply ROT-13 to current line |
| :w|so % | chain commands: write and then source buffer |
| :e! | throw away unsaved changes, reload buffer |
| :hide edit foo | edit foo, hide current buffer if dirty |
Useless fun fact: we piped a line to tr in an example
above to apply a ROT-13 cypher, but Vim has that functionality built in
with the the g? command. Apply it to a motion, like
g?$.
Filetypes are a way to change settings based on the type of file detected in a buffer. They don’t need to be automatically detected though, we can manually enable them to interesting effect. An example is doing hex editing. Any file can be viewed as raw hexadecimal values. GitHub user the9ball created a clever ftplugin script that filters a buffer back and forth through the xxd utility for hex editing.
The xxd utility was bundled as part of Vim 5 for convenience. The Vim todo.txt file mentions they want to make it more seamless to edit binary files, but xxd can take us pretty far.
Here is code you can put in ~/.vim/ftplugin/xxd.vim. Its
presence in ftplugin means Vim will execute the script when filetype
(aka “ft”) becomes xxd. I added some basic comments to the script.
" without the xxd command this is all pointless
if !executable('xxd')
    finish
endif

" don't insert a newline in the final line if it
" doesn't already exist, and don't insert linebreaks
setlocal binary noendofline
silent %!xxd -g 1
%s/\r$//e

" put the autocmds into a group for easy removal later
augroup ftplugin-xxd
    " erase any existing autocmds on buffer
    autocmd! * <buffer>

    " before writing, translate back to binary
    autocmd BufWritePre <buffer> let b:xxd_cursor = getpos('.')
    autocmd BufWritePre <buffer> silent %!xxd -r

    " after writing, restore hex view and mark unmodified
    autocmd BufWritePost <buffer> silent %!xxd -g 1
    autocmd BufWritePost <buffer> %s/\r$//e
    autocmd BufWritePost <buffer> setlocal nomodified
    autocmd BufWritePost <buffer> call setpos('.', b:xxd_cursor) | unlet b:xxd_cursor

    " update text column after changing hex values
    autocmd TextChanged,InsertLeave <buffer> let b:xxd_cursor = getpos('.')
    autocmd TextChanged,InsertLeave <buffer> silent %!xxd -r
    autocmd TextChanged,InsertLeave <buffer> silent %!xxd -g 1
    autocmd TextChanged,InsertLeave <buffer> call setpos('.', b:xxd_cursor) | unlet b:xxd_cursor
augroup END

" when filetype is set to no longer be "xxd," put the binary
" and endofline settings back to what they were before, remove
" the autocmds, and replace buffer with its binary value
let b:undo_ftplugin = 'setl bin< eol< | execute "au! ftplugin-xxd * <buffer>" | execute "silent %!xxd -r"'
Try opening a file, then running :set ft. Note what type
it is. Then:set ft=xxd. Vim will turn into a hex editor. To
restore your view, :set ft=foo where foo was the original
type. Note that in hex view you even get syntax highlighting because
$VIMRUNTIME/syntax/xxd.vim ships with Vim by default.
Notice the nice use of “b:undo_ftplugin” which is an opportunity for
filetypes to clean up after themselves when the user or ftdetect
mechanism switches away from them to another filetype. (The example
above could use a little work because if you :set ft=xxd
then set it back, the buffer is marked as modified even if you never
changed anything.)
Ftplugins also allow you to refine an existing filetype. For
instance, Vim already has some good defaults for C programming in
$VIMRUNTIME/ftplugin/c.vim. I put these extra options in
~/.vim/after/ftplugin/c.vim to add my own settings on
top:
" the smartest indent engine for C
setlocal cindent
" my preferred "Allman" style indentation
setlocal cino="Ls,:0,l1,t0,(s,U1,W4"

" for quickfix errorformat
compiler clang
" shows long build messages better
setlocal ch=2

" auto-create folds per grammar
setlocal foldmethod=syntax
setlocal foldlevel=10

" local project headers
setlocal path=.,,*/include/**3,./*/include/**3
" basic system headers
setlocal path+=/usr/include

setlocal tags=./tags,tags;~
"                      ^ in working dir, or parents
"                ^ sibling of open file

" the default is menu,preview but the preview window is annoying
setlocal completeopt=menu

iabbrev #i #include
iabbrev #d #define
iabbrev main() int main(int argc, char **argv)

" add #include guard
iabbrev #g _<c-r>=expand("%:t:r")<cr><esc>VgUV:s/[^A-Z]/_/g<cr>A_H<esc>yypki#ifndef <esc>j0i#define <esc>o<cr><cr>#endif<esc>2ki
Notice how the script uses “setlocal” rather than “set.” This applies the changes to just the current buffer rather than the whole Vim instance.
This script also enables some light abbreviations. Like I can type
#g and press enter and it adds an include guard with the
current filename:
#ifndef _FILENAME_H
#define _FILENAME_H

/* <-- cursor here */

#endif
You can also mix filetypes by using a dot (“.”). Here is one
application. Different projects have different coding conventions, so
you can combine your default C settings with those for a particular
project. The OpenBSD source code follows the style(9) format, so let’s
make a special openbsd filetype. Combine the two filetypes with
:set ft=c.openbsd on relevant files.
To detect the openbsd filetype we can look at the contents
of buffers rather than just their extensions or locations on disk. The
telltale sign is that C files in the OpenBSD source
contain /* $OpenBSD: in the first line.
To detect them, create
~/.vim/after/ftdetect/openbsd.vim:
augroup filetypedetect
        au BufRead,BufNewFile *.[ch]
                \  if getline(1) =~ 'OpenBSD;'
                \|   setl ft=c.openbsd
                \| endif
augroup END
The Vim
port for OpenBSD already includes a special syntax file for this
filetype: /usr/local/share/vim/vimfiles/syntax/openbsd.vim.
If you recall, the /usr/local/share/vim/vimfiles directory
is in the runtimepath and is set aside for files from the system
administrator. The provided openbsd.vim script includes a function:
function! OpenBSD_Style()
    setlocal cindent
    setlocal cinoptions=(4200,u4200,+0.5s,*500,:0,t0,U4200
    setlocal indentexpr=IgnoreParenIndent()
    setlocal indentkeys=0{,0},0),:,0#,!^F,o,O,e
    setlocal noexpandtab
    setlocal shiftwidth=8
    setlocal tabstop=8
    setlocal textwidth=80
endfun
We simply need to call the function at the appropriate time. Create
~/.vim/after/ftplugin/openbsd.vim:
call OpenBSD_Style()Now opening any C or header file with the characteristic comment at the top will be recognized as type c.openbsd and will use indenting options that conform with the style(9) man page.
This is a friendly reminder that despite our command-line machismo, the mouse is in fact supported in Vim, and can do some things more easily than the keyboard. Mouse events work even over SSH thanks to xterm turning mouse events into stdin escape codes.
To enable mouse support, set mouse=n. Many people use
mouse=a to make it work in all modes, but I prefer to
enable it only in normal mode. This avoids creating visual selections
when I click links with a keyboard modifier to open them in my
browser.
Here are things the mouse can do:
foldcolumn > 0).This section could be enormous, but I’ll stick to a few tricks I
learned. The first one that blew me away was
:set virtualedit=all. It allows you to move the cursor
anywhere in the window. If you enter characters or insert a visual
block, Vim will add whatever spaces are required to the left of the
inserted characters to keep them in place. Virtual edit mode makes it
simple to edit tabular data. Turn it off with
:set virtualedit=.
Next are some movement commands. I used to rely a lot on
} to jump by paragraphs, and just muscle my way down the
page. However the ] character makes more precise motions:
by function ]], scope ]}, paren ‘])’, comment
]/, diff block ]c. This series is why the
quickfix mapping ]q mentioned earlier fits the pattern so
well.
For big jumps I used to try things like 1000j, but in
normal mode you can actually just type a percentage and Vim will go
there, like 50%. Speaking of scroll percentage, you can see
it at any time with CTRL-G. Thus I now do :set noruler and
ask to see the info as needed. It’s less cluttered. Kind of the opposite
of the trend of colorful patched font powerlines.
After jumping around between tags, files, or within a file, there are
some commands to get your bearings. Try :ls,
:tags, :jumps, and :marks.
Jumping through tags actually creates a stack, and you can press CTRL-T
to pop one back. I used to always press CTRL-O to back out of jumps, but
it is not as direct as popping the tag stack.
In a project directory that has been indexed with ctags, you can open
the editor directly to a tag with -t, like
vim -t main. To find tags files more flexibly, set the
tags configuration variable. Note the semicolon in the
example below that allows Vim to search the current directory
upward to the home directory. This way you could have a more
general system tags file outside the project folder.
set tags=./tags,**5/tags,tags;~
"                          ^ in working dir, or parents
"                   ^ in any subfolder of working dir
"           ^ sibling of open file
There are some buffer tricks too. Switching to a buffer with
:bu can take a fragment of the buffer name, not just a
number. Sometimes it’s harder to memorize those numbers than remember
the name of a source file. You can navigate buffers with marks too. If
you use a capital letter as the name of a mark, you can jump to it
across buffers. You could set a mark H in a header, C in a source file,
and M in a Makefile to go from one buffer to another.
Do you ever get mad after yanking a word, deleting a word somewhere
else, trying paste the first word in, and then discovering your original
yank is overwritten? The Vim registers are underappreciated for this.
Inspect their contents with :reg. As you yank text,
previous yanks are rotated into the registers "0 -
"9. So "0p pastes the next-to-last
yank/deletion. The special registers "+ and "*
can copy/paste from/to the system clipboard. They usually mean the same
thing, except in some X11 setups that distinguish primary and secondary
selection.
Another handy hidden feature is the command line window. It it’s a
buffer that contains your previous commands and searches. Bring it up
with q: or q/. Once inside you can move to any
line and press enter to run it. However you can also edit any of the
lines before pressing enter. Your changes won’t affect the line (the new
command will merely be added to the bottom of the list).
This article could go on and on, so I’m going to call it here. For more great topics, see these help sections: views-sessions, viminfo, TOhtml, ins-completion, cmdline-completion, multi-repeat, scroll-cursor, text-objects, grep, netrw-contents.

Written by Joe "begriffs" Nelson